Your First API Collection in Bruno and Postman: Requests, Environments, and Variables
Written by Ahmed at Analyst Engineering, a Senior Technical Business Analyst with 10+ years in banking and payments delivery.
Key takeaways
- An API collection is a saved, versionable set of requests with environments, auth, scripts, and documentation, which turns a one-off curl command into a repeatable project asset.
- Since Bruno v3.1, new collections are saved as OpenCollection YAML files (.yml) in a folder you own; the older .bru format is still supported.
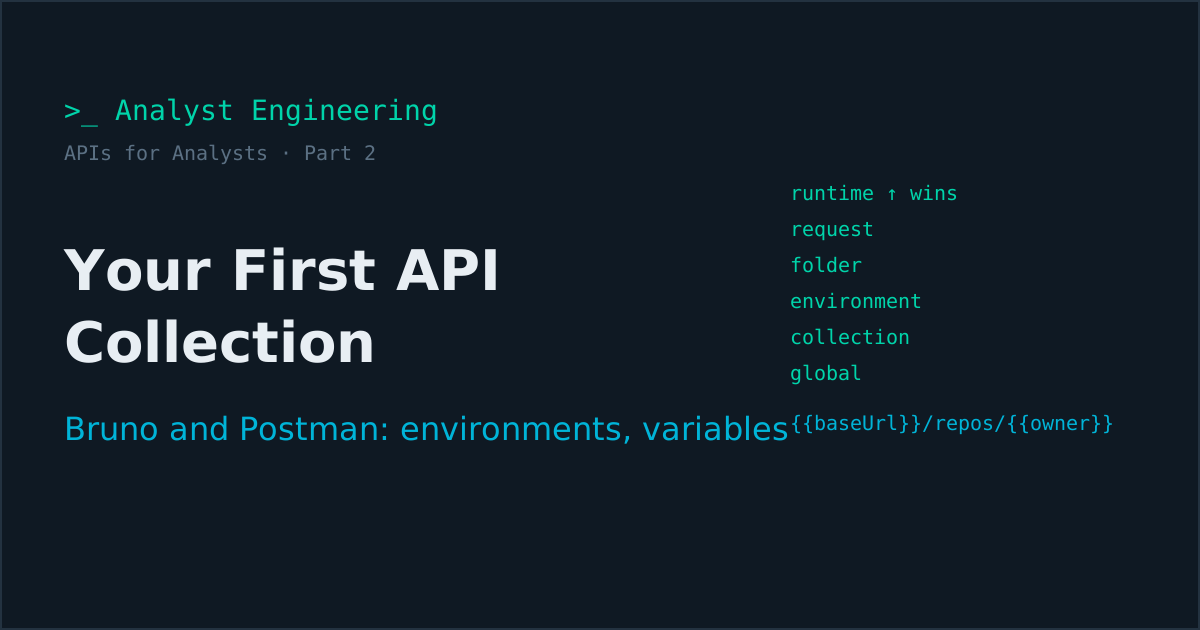
- When two variable scopes define the same name, the narrowest scope wins: in Bruno runtime beats request, folder, environment, collection, and global; in Postman local beats data, environment, collection, and global.
- Secrets never go in a collection or environment file. In Bruno they live in a gitignored .env file referenced as {{process.env.NAME}}; in Postman they belong in the local-only value or Postman Vault.
- Copy as cURL in the browser's Network tab, pasted into Bruno or Postman, reproduces the exact API call a screen made, which is the fastest way for an analyst to replay and investigate real behavior.
Your first API collection needs four things: a base URL stored in an environment, requests that reference it as {{baseUrl}}, authentication set once and inherited, and secrets kept outside every file you commit. Get those right on day one in Bruno or Postman and the collection grows into a test suite, a demo, and an investigation tool without being rebuilt.
To build a first API collection in Bruno or Postman: create the collection, create an environment holding baseUrl, add requests that use {{baseUrl}} instead of a hardcoded host, configure auth at collection level with each request set to inherit, store credentials in a gitignored .env file (Bruno) or a local-only value or vault (Postman), and name every request as the business action it performs. This article builds exactly that against the public GitHub REST API, so you can follow along without asking anyone for access.
APIs for Analysts, part 2 of 8. Previous: Part 1, what is an API and how it works. Next: Part 3, how to analyze an API. All parts: series overview.
If you have not picked a tool yet, the trade-offs are in Bruno vs Postman for analysts. The short version: Bruno keeps the collection as files in your repository, Postman keeps it in a cloud workspace. Everything below works in both, and I show both. The test design that grows out of a collection like this is the core of API Testing and QA Mastery for BAs.
What is an API collection, and why not just use curl?
A collection is a named set of saved requests plus everything they need to run: environments, variables, authentication, scripts, tests, and notes. curl is perfect for one question asked once. A collection is what you build when the question will be asked again, by you next sprint or by a teammate next month.
| curl in a terminal | A collection in Bruno or Postman | |
|---|---|---|
| Saved | In your shell history, if you are lucky | As named requests in folders |
| Switch environment | Edit the URL by hand | Pick SIT or UAT from a dropdown |
| Auth | Paste the token every time | Set once, inherited by every request |
| Chaining | Copy values by hand | Scripts pass values between requests |
| Assertions | Read the output yourself | Tests pass or fail automatically |
| Shareable | A snippet in a chat | A folder in git, or a shared workspace |
The moment you catch yourself scrolling shell history for “that request from Tuesday”, you need a collection.
How do you set up a collection in Bruno?
Install Bruno from usebruno.com, choose Create Collection, give it a name, and pick a folder on disk. Since Bruno v3.1, new collections are saved in the OpenCollection YAML format, so the folder looks like this once we are done:
github-api/
├── opencollection.yml
├── .env
├── .env.sample
├── .gitignore
├── environments/
│   ├── public.yml
│   └── authenticated.yml
└── repositories/
    ├── folder.yml
    ├── get-repository.yml
    └── list-open-issues.yml
Older collections use .bru files instead, and Bruno still reads them; the structure and ideas are identical. You can see the .bru equivalent in the Bruno vs Postman comparison.
Step 1: create an environment
Open Environments, create one called public, and add three variables. Bruno writes it to environments/public.yml:
name: public
variables:
  - name: baseUrl
    value: https://api.github.com
  - name: owner
    value: usebruno
  - name: repo
    value: bruno
Select public in the environment dropdown at the top right. Nothing works until an environment is selected, and forgetting to select one is the most common first-day problem.
Step 2: add a request that uses the variables
Create a folder called repositories, then a request called Get repository. The saved file:
info:
  name: Get repository
  type: http
  seq: 1

http:
  method: GET
  url: "{{baseUrl}}/repos/{{owner}}/{{repo}}"
  headers:
    - name: Accept
      value: application/vnd.github+json
    - name: X-GitHub-Api-Version
      value: "2022-11-28"
  auth: inherit

runtime:
  assertions:
    - expression: res.status
      operator: eq
      value: "200"
    - expression: res.body.full_name
      operator: isString

settings:
  encodeUrl: true
Press send. You get a 200, a large JSON body, and two green assertions. Hover over {{owner}} in the URL bar and Bruno shows the resolved value, which is the habit that saves you when a variable is not what you think.
Add a second request, List open issues, with URL {{baseUrl}}/repos/{{owner}}/{{repo}}/issues and two query parameters, state = open and per_page = 5. Look at the response headers for Link: that is how GitHub tells you there are more pages. Pagination is a requirement, not a detail, and it comes back in Part 3.
Step 3: add authentication without putting a secret in a file
Unauthenticated GitHub calls are limited to 60 per hour. To lift that, create a fine-grained personal access token in GitHub with read-only access to public repositories, then create .env at the collection root:
GITHUB_TOKEN=github_pat_replace_meAdd it to .gitignore immediately, and commit a .env.sample with the name but no value:
# .gitignore
.env

# .env.sample
GITHUB_TOKEN=
Create a second environment, authenticated, that reads the secret from the process environment:
name: authenticated
variables:
  - name: baseUrl
    value: https://api.github.com
  - name: owner
    value: usebruno
  - name: repo
    value: bruno
  - name: githubToken
    value: "{{process.env.GITHUB_TOKEN}}"
Finally open Collection Settings, go to Auth, choose Bearer Token, and enter {{githubToken}}. Every request set to auth: inherit now sends it. Switch to the authenticated environment, send Get repository, and X-RateLimit-Limit in the response jumps from 60 to 5,000.
The token exists in exactly one place, a file git ignores. The environment references it; the collection references the environment. That chain is the entire secret management model, and it is why a Bruno collection can be committed and shared safely. The wider credential picture, including OAuth client credentials and mutual TLS, is in API keys, PATs, and OAuth tokens.
How do you set up the same collection in Postman?
The concepts map one to one; only the storage differs.
- Create a collection called
github-apiin your workspace. - Create an environment called
publicwithbaseUrl,owner, andrepo, and select it in the environment dropdown. - Add a request named Get repository, method
GET, URL{{baseUrl}}/repos/{{owner}}/{{repo}}, with the same two headers. - Set auth at collection level. Open the collection, go to Authorization, choose Bearer Token, and enter
{{githubToken}}. On each request, leave Authorization on Inherit auth from parent. - Store the token safely. Postman distinguishes a value that syncs to the workspace from a value kept only on your machine (older versions label them initial and current). Put the token only in the local value, mark the variable as secret, or better, store it in Postman Vault and reference it as
{{vault:github-token}}, which never syncs. - Add a test in the request’s Scripts > Post-response tab:
pm.test("repository returned", () => {
  pm.response.to.have.status(200);
  pm.expect(pm.response.json().full_name).to.be.a("string");
});
The one Postman habit to build early: before sharing or exporting anything, check the environment for values in the synced column. Exported environments and shared workspaces are where tokens leak.
How do variable scopes work, and which value wins?
Both tools let the same variable name exist in several scopes. When names clash, the narrowest scope wins. Learn this ladder once and a whole class of “it worked yesterday” problems disappears.
| Precedence | Bruno | Postman |
|---|---|---|
| Highest (narrowest) | Runtime variables, set by scripts | Local variables, set by scripts |
| Request variables | Data variables, from a CSV or JSON run | |
| Folder variables | Environment variables | |
| Environment variables | Collection variables | |
| Collection variables | Global variables | |
| Lowest (broadest) | Global variables | |
| Outside the ladder | {{process.env.NAME}} from .env | {{vault:name}} from Postman Vault |
Note the order of the two middle rows: in both tools an environment variable overrides a collection variable of the same name. That is the trap. Someone adds baseUrl to the collection pointing at SIT, an old environment still defines baseUrl pointing at a retired test server, and every request quietly goes to the wrong place. The response even looks plausible.
What goes where, as a rule of thumb:
| Value | Scope | Why |
|---|---|---|
| Base URL, per deployment | Environment | Changes between local, SIT, UAT |
| API version header, stable test data | Collection | Same everywhere the collection runs |
| Values shared by one journey | Folder | Scoped to the flow that needs them |
| IDs captured from a response | Runtime (Bruno) or local (Postman) | Only valid for this run |
| Tokens, keys, passwords | .env or vault | Never in a committed or synced file |
When a request misbehaves, check the resolved values before anything else: the eye icon next to the environment dropdown in Bruno, or the quick look icon in Postman, or a one-line console.log(bru.getEnvVar("baseUrl")). Nine times out of ten the variable is not what you think.
How do you import a real request from your browser?
This is the single most useful trick in this article, and the one that separates an analyst who reads about the system from one who observes it.
- Open your application in a test environment, press F12, and select the Network tab.
- Filter on Fetch/XHR and perform the action you care about, for example submitting a payment form.
- Right-click the request the screen made, then choose Copy > Copy as cURL (bash).
- Bruno: create a new request and choose the option to create it from cURL, then paste. Postman: click Import and paste the text.
- Clean it up before saving: delete the
Cookieheader and any session token, replace the host with{{baseUrl}}, and set auth to inherit.
You now have the exact request the UI sends, including the fields the specification forgot to mention and the headers nobody documented. I have found undocumented fields, mismatched enum values, and a client-side validation the API itself did not enforce, all within the first hour of doing this on a new project.
One warning worth repeating: a copied cURL command contains your live session. Never paste an uncleaned one into a ticket, a chat, or an AI tool.
The other fast import is from a specification. Both tools import OpenAPI files and generate a request for every endpoint. GitHub publishes its OpenAPI description in the github/rest-api-description repository, and Stripe publishes its in stripe/openapi. Reading one of those specs properly is covered in reading an API contract.
How should an analyst organize a collection?
Organize by business journey, not by endpoint. A developer’s collection mirrors the code; an analyst’s collection mirrors the process, and that is what makes it useful to testers, product owners, and support.
- Number the folders in journey order:
00-auth,10-create-payment,20-track-status,30-rejections. The runner executes them in that order. - Name requests as business actions: “Submit credit transfer”, not
POST /v1/payments. The method and path are already visible. - Use the docs field. Both tools let each request carry Markdown notes. Write the business rule it proves and the requirement ID it traces to.
- Tag requests such as
smokeandregressionso a run can target a subset. Bruno stores tags in the request’sinfoblock. - Keep one request per behavior. “Submit with closed account” is its own request with its own assertions, not a body you edit by hand before each demo.
What are the first five requests worth building?
These five use public APIs, need no approvals, and each teaches one lesson you will use on real projects.
| Request | Lesson |
|---|---|
GET https://api.github.com/repos/usebruno/bruno | Variables, headers, and rate limit headers |
GET .../issues?state=open&per_page=5 | Query parameters and pagination through the Link header |
GET https://httpbin.org/status/503 | What your assertions do when the server fails |
GET https://httpbin.org/delay/5 with a 2 second timeout | Timeouts are a client decision, and a requirement |
POST https://jsonplaceholder.typicode.com/posts, then GET .../posts/101 | The POST returns 201 with "id": 101, the GET returns 404, because JSONPlaceholder fakes writes. A 201 is a claim, not proof that data was stored |
That last pair is my favorite teaching request. It shows in thirty seconds why a good test checks the side effect and not just the response, a point API testing makes at length.
A first-collection checklist
Before you share the collection or build on it, confirm:
- No host is hardcoded; every URL starts with
{{baseUrl}}. - Auth is configured once, at collection level, and inherited.
- No token, key, or password exists in any collection, environment, or request file.
.envis in.gitignore, and.env.samplelists the names.- Folders follow the business journey, and requests are named as actions.
- Every request has at least a status assertion.
- The collection runs green from a clean clone with only
.envfilled in.
If a request refuses to work, why did my API request fail? walks through every common error by symptom, from SSL certificate problems on corporate networks to unresolved variables.
The APIs for Analysts series
- What is an API and how it works
- Your first API collection in Bruno and Postman (you are here)
- How to analyze an API: capability, data, behavior, limits, and change
- How to document an API: the sections consumers need, OpenAPI, and the error catalogue
- How to write API test cases: deriving a complete suite from one endpoint
- Chaining API requests with JavaScript: variables, scripts, polling, and a full Stripe flow
- API proof of concept and demos: POCs and demos that settle decisions
- The analyst who can send a request: why it is an edge, and a 30-day plan
Beyond the core series, the APIs for Analysts learning path organizes companion articles by level: the API glossary and troubleshooting failed requests for beginners, webhooks and GraphQL at intermediate level, and API design review, versioning and breaking changes, API security testing, and API tests in CI for advanced analysts.
The takeaway
A first API collection is small, but its foundations decide whether it grows. Put the base URL in an environment, reference it everywhere, configure auth once and inherit it, and keep secrets in .env or a vault so the collection itself is safe to commit. Learn the scope ladder, narrowest wins and environment beats collection, and check resolved values before debugging anything else. Then use Copy as cURL to pull real requests out of your own application, because a replayable request is worth more than a paragraph of specification.
With the foundation in place, Part 6 turns these requests into a chained, scripted flow. For the test design that makes a collection a real suite, see API Testing and QA Mastery for BAs. If you would rather set up your first collection against your own team’s API with someone who has done it on banking programmes, book a 1:1 Tech BA Coaching Call, or browse everything at The Tech BA Toolkit.
Ahmed is a Senior Technical Business Analyst with 10+ years in banking and payments. He builds practical guides and tools for analysts at The Tech BA Toolkit.
Tags: Bruno, Postman, API Testing, Environment Variables, Technical Analyst
About the author
Analyst Engineering is written by Ahmed, a Senior Technical Business Analyst with 10+ years of banking and payments delivery experience: ISO 20022 and SWIFT messaging, payments API integration, Kafka event validation, and production support. Every article comes from real delivery work, and each one is reviewed and updated as tools and standards change.
Related articles
- What Is an API? How APIs Actually Work, Explained for Analysts What an API is and how one works, for analysts: request and response, methods, headers, auth, status codes, and a real GitHub API call you can send today.
- Chaining API Requests With JavaScript in Bruno and Postman: The Scripts Analysts Need Chain API requests in Bruno and Postman: capture values, pre-request and post-response scripts, token refresh, polling, branching, and a Stripe sandbox flow.
- Bruno vs Postman for Analysts: Git-Native Collections vs the Full Platform Bruno stores API collections as plain files in your repo; Postman stores them in a cloud workspace. The trade-offs, with a pacs.008 test suite in both.
- API Keys, PATs, and OAuth Tokens: The Analyst's Guide to Credentials The difference between an API key, a personal access token, and an OAuth token, how to scope and rotate them, and where they belong across an analyst toolchain.
Free account
Practice on the Labs, keep your progress
A free account, no password: an email link signs you in. It saves your steps and self-assessments on the Labs, shows your missions on a dashboard, unlocks the solutions, and, if you tick the box, sends you new missions and articles when they ship.
Your email is used to sign you in. Nothing else, unless you ask. Privacy.