Chaining API Requests With JavaScript in Bruno and Postman: The Scripts Analysts Need
Written by Ahmed at Analyst Engineering, a Senior Technical Business Analyst with 10+ years in banking and payments delivery.
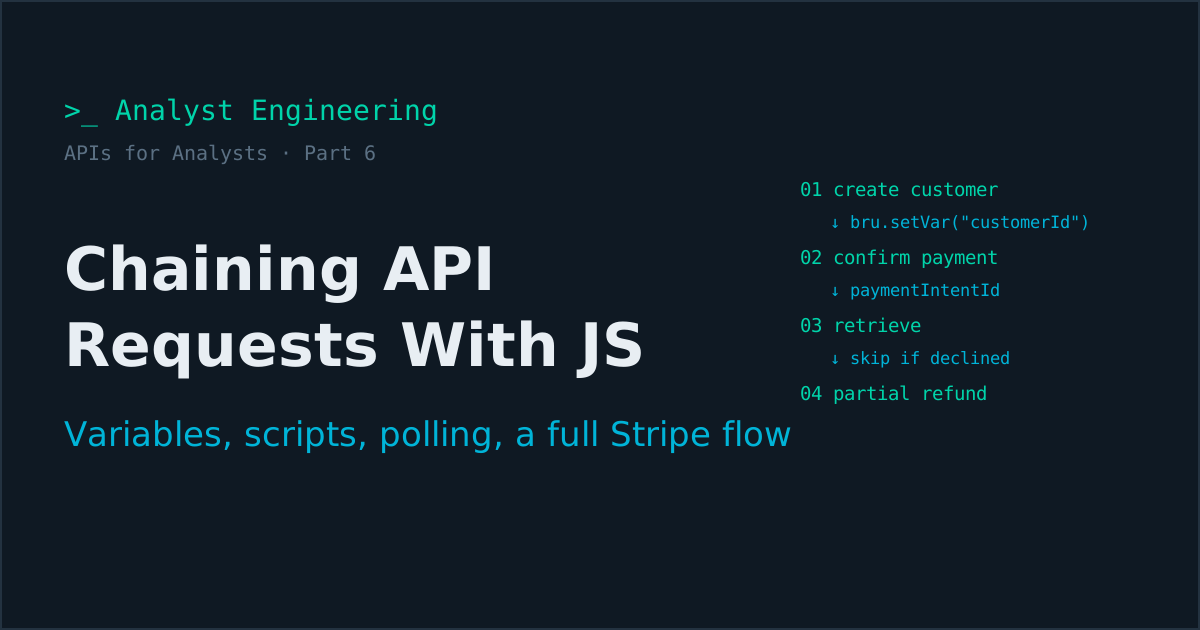
Key takeaways
- Request chaining captures a value from one API response, stores it in a variable, and uses it in the next request, so a sequence of calls reproduces a real business flow end to end.
- Scripts run at two points around every request: a pre-request script prepares data, headers, and tokens; a post-response script captures values, decides what runs next, and asserts results.
- Store captured IDs and tokens in runtime variables (bru.setVar in Bruno, pm.variables or collection variables in Postman), because in Bruno v4 bru.setEnvVar writes the value to the environment file on disk.
- Polling an asynchronous API in a collection run is a self-loop: the post-response script waits, then calls bru.runner.setNextRequest or pm.execution.setNextRequest with the same request name until a final status or an attempt limit.
- Stripe's sandbox supports a complete chain without writing application code: create a customer, create and confirm a PaymentIntent with test card pm_card_visa, retrieve it, and refund part of it, with pm_card_visa_chargeDeclined for the decline branch.
Request chaining captures a value from one API response and feeds it into the next request, so a collection reproduces a real business flow instead of isolated calls. Scripts make it work: a pre-request script prepares each call, a post-response script captures values, branches, and asserts. An analyst needs about ten JavaScript constructs to do all of it.
To chain API requests in Bruno or Postman: in the post-response script of the first request, read the response body and store the value you need in a runtime variable (bru.setVar in Bruno, pm.collectionVariables.set or pm.variables.set in Postman); reference it as {{variableName}} in the next request; run the sequence with the collection runner. Add pre-request scripts for unique data and token refresh, a self-loop for polling asynchronous statuses, and guards that skip dependent requests when an earlier step fails.
APIs for Analysts, part 6 of 8. Previous: Part 5, how to write API test cases. Next: Part 7, API proof of concept and demos. All parts: series overview.
The worked example is a complete card payment flow in Stripe’s sandbox, so you can build and run every line without access to a company system. Collection setup, environments, and secrets come from Part 2; this article assumes them. The same chaining approach applied to event-driven systems, where the next step is a Kafka message rather than an HTTP response, is in Automate Kafka Validation with Postman.
What is request chaining, and why does it matter?
Chaining is what turns endpoints into a process. A real payment is never one call: you create a customer, take a payment for that customer, check the outcome, and maybe refund part of it. Each step needs an identifier the previous step returned.
Create customer ──> customerId ──> Create and confirm payment ──> paymentIntentId
                                                                        │
                        Partial refund <── Retrieve payment <───────────┘
Without chaining, you copy cus_ and pi_ identifiers between tabs by hand, which is slow, error prone, and impossible to rerun. With chaining, one click or one command replays the whole flow with fresh data. That is the difference between checking an endpoint and proving a process, a distinction API testing makes central.
Where do scripts run in the request lifecycle?
Around every request, at two points, and at three levels.
| Point | Runs | Typical use |
|---|---|---|
| Pre-request | Before the request is sent | Generate unique IDs, set headers, refresh tokens, build the body |
| (request is sent) | ||
| Post-response | After the response arrives | Capture values, decide the next request, log |
| Tests | After the response arrives | Assert status, body, and headers |
Both tools also let you attach scripts at collection and folder level, which run for every request inside them. That is where shared logic belongs, such as a token refresh that every request needs. In Bruno, request files store these as before-request, after-response, and tests script types; in Postman they are the Pre-request and Post-response tabs under Scripts.
A useful discipline: scripts prepare and capture, tests assert. Keep assertions out of capture logic and your reports stay readable.
What JavaScript does an analyst actually need?
About ten constructs. Here they are against a realistic response body:
const body = res.getBody();            // Postman: pm.response.json()

body.id                                // dot notation: "pi_3Q..."
body.charges?.data?.[0]?.id            // optional chaining: undefined instead of a crash
body.data.find(p => p.status === "succeeded")        // first match
body.data.filter(p => p.amount > 100000)             // all matches
body.data.map(p => p.id)                             // just the IDs
body.data.some(p => p.currency !== "eur")            // any match? true or false
`E2E-${Date.now()}`                    // template literal for unique values
new Date().toISOString()               // "2026-09-15T10:42:00.000Z"
if (res.getStatus() !== 200) { /* branch */ }
test("status is succeeded", () => expect(body.status).to.equal("succeeded"));
That is genuinely most of it. If find, filter, and optional chaining are new, they are worth twenty minutes of practice, because they are also exactly what you need to read JSON fluently in JSON for analysts.
How do the Bruno and Postman script APIs compare?
The concepts are identical; the names differ. Keep this table open while you work.
| Task | Bruno | Postman |
|---|---|---|
| Response body as JSON | res.getBody() | pm.response.json() |
| Status code | res.getStatus() | pm.response.code |
| Response header | res.getHeader("request-id") | pm.response.headers.get("request-id") |
| Response time (ms) | res.getResponseTime() | pm.response.responseTime |
| Set a runtime variable | bru.setVar("k", v) | pm.variables.set("k", v) |
| Set a variable that survives the run | bru.setEnvVar("k", v) | pm.collectionVariables.set("k", v) |
| Read a variable | bru.getVar("k"), bru.getEnvVar("k") | pm.variables.get("k") |
| Read a secret from the process | bru.getProcessEnv("K") | {{vault:k}} in a field |
| Set a request header | req.setHeader("k", v) | pm.request.headers.upsert({ key: "k", value: v }) |
| Replace the body | req.setBody(obj) | pm.request.body.update({ mode: "raw", raw: JSON.stringify(obj) }) |
| Assertion | test("name", fn) + expect | pm.test("name", fn) + pm.expect |
| Run a named request next | bru.runner.setNextRequest("Name") | pm.execution.setNextRequest("Name") |
| Skip this request | bru.runner.skipRequest() | pm.execution.skipRequest() |
| Stop the run | bru.runner.stopExecution() | pm.execution.setNextRequest(null) |
| Wait | await bru.sleep(2000) | setTimeout(() => {}, 2000) |
| Send a side request | await bru.sendRequest({...}) | pm.sendRequest({...}, callback) |
| Dynamic data in a script | bru.interpolate("{{$randomUUID}}") | pm.variables.replaceIn("{{$guid}}") |
One Bruno detail changes a habit: since Bruno v4, bru.setEnvVar persists the value to the environment file on disk. Capture a token with it and the token lands in a file that may be committed. Use bru.setVar for anything captured at runtime, and reserve bru.setEnvVar for values you genuinely want saved.
Worked chain: a Stripe sandbox payment from customer to refund
Setup
Create a free Stripe account, open a sandbox, and copy the test secret key. Put it in the collection’s .env:
STRIPE_SECRET_KEY=sk_test_replace_meEnvironment environments/sandbox.yml:
name: sandbox
variables:
  - name: baseUrl
    value: https://api.stripe.com
  - name: stripeKey
    value: "{{process.env.STRIPE_SECRET_KEY}}"
  - name: testCard
    value: pm_card_visa
At collection level, set auth to Bearer Token with {{stripeKey}}. Stripe accepts form-encoded request bodies and returns JSON. The folder:
stripe-payment-flow/
├── opencollection.yml
├── .env
├── environments/
│   └── sandbox.yml
└── 10-card-payment/
    ├── 01-create-customer.yml
    ├── 02-create-and-confirm-payment.yml
    ├── 03-retrieve-payment.yml
    └── 04-partial-refund.yml
Step 1: create a customer and start a clean run
info:
  name: Create customer
  type: http
  seq: 1

http:
  method: POST
  url: "{{baseUrl}}/v1/customers"
  body:
    type: form-urlencoded
    data:
      - name: email
        value: "{{runId}}@example.com"
      - name: name
        value: Analyst Engineering Demo
      - name: metadata[run_id]
        value: "{{runId}}"
  auth: inherit

runtime:
  scripts:
    - type: before-request
      code: |-
        // Reset anything a previous run left behind
        bru.setVar("customerId", null);
        bru.setVar("paymentIntentId", null);

        const runId = `run-${Date.now()}`;
        bru.setVar("runId", runId);
        req.setHeader("Idempotency-Key", `${runId}-customer`);
    - type: after-response
      code: |-
        if (res.getStatus() === 200) {
          bru.setVar("customerId", res.getBody().id);
        }
    - type: tests
      code: |-
        test("customer created", function () {
          expect(res.getStatus()).to.equal(200);
          expect(res.getBody().id).to.match(/^cus_/);
        });
Three habits are packed into that file. The reset at the top stops a stale ID from a previous run silently feeding the chain. The run ID makes every run’s data unique and traceable in the Stripe dashboard through metadata. The idempotency key makes the call safe to retry, as Stripe documents for all POST requests.
Note the test expects 200, not 201. Stripe returns 200 when it creates an object. If you wrote 201 from convention, this is where you find out, which is the point Part 1 made about reading the docs and sending the request.
Step 2: create and confirm the payment, with a branch
info:
  name: Create and confirm payment
  type: http
  seq: 2

http:
  method: POST
  url: "{{baseUrl}}/v1/payment_intents"
  body:
    type: form-urlencoded
    data:
      - name: amount
        value: "2000"
      - name: currency
        value: eur
      - name: customer
        value: "{{customerId}}"
      - name: payment_method
        value: "{{testCard}}"
      - name: confirm
        value: "true"
      - name: automatic_payment_methods[enabled]
        value: "true"
      - name: automatic_payment_methods[allow_redirects]
        value: never
      - name: metadata[run_id]
        value: "{{runId}}"
  auth: inherit

runtime:
  scripts:
    - type: before-request
      code: |-
        if (!bru.getVar("customerId")) {
          bru.runner.skipRequest();
        }
        req.setHeader("Idempotency-Key", `${bru.getVar("runId")}-payment`);
    - type: after-response
      code: |-
        const body = res.getBody();
        if (res.getStatus() === 200) {
          bru.setVar("paymentIntentId", body.id);
        } else {
          bru.setVar("declineCode", body.error?.decline_code);
          console.log(`Declined: ${body.error?.code} / ${body.error?.decline_code}`);
        }
    - type: tests
      code: |-
        const expectDecline = bru.getEnvVar("testCard") !== "pm_card_visa";

        if (expectDecline) {
          test("decline returns 402 with a decline code", function () {
            expect(res.getStatus()).to.equal(402);
            expect(res.getBody().error.code).to.equal("card_declined");
            expect(res.getBody().error.decline_code).to.be.a("string");
          });
        } else {
          test("payment succeeded for 20.00 EUR", function () {
            expect(res.getStatus()).to.equal(200);
            expect(res.getBody().status).to.equal("succeeded");
            expect(res.getBody().amount).to.equal(2000);
          });
        }
amount is 2000 because Stripe amounts are in the smallest currency unit, so this is 20.00 EUR, the data mapping trap from Part 3. allow_redirects=never keeps the sandbox from requiring a return URL for redirect-based payment methods, which a server-side chain cannot follow.
The branch is driven by data, not by editing the script: switch testCard in the environment to pm_card_visa_chargeDeclined and the same request proves the decline path, with Stripe’s documented card_declined code and generic_decline decline code. Try pm_card_visa_chargeDeclinedInsufficientFunds for insufficient_funds.
Step 3 and 4: retrieve, then refund part of it, with guards
03-retrieve-payment.yml is a GET {{baseUrl}}/v1/payment_intents/{{paymentIntentId}} with this before-request guard:
if (!bru.getVar("paymentIntentId")) {
  bru.runner.skipRequest();   // the payment was declined; nothing to retrieve
}
and a test that the retrieved status still reads succeeded and customer equals bru.getVar("customerId"). That second assertion checks the chain itself: the payment belongs to the customer created in this run.
04-partial-refund.yml posts to {{baseUrl}}/v1/refunds with payment_intent = {{paymentIntentId}} and amount = 500, the same guard, and this test:
test("partial refund of 5.00 EUR created", function () {
  expect(res.getStatus()).to.equal(200);
  expect(res.getBody().amount).to.equal(500);
  expect(["succeeded", "pending"]).to.include(res.getBody().status);
});
Accepting pending as well as succeeded is deliberate. Refund status is not guaranteed to be final at response time, and a test that demands succeeded will eventually flake for a reason that is not a defect.
Run the folder:
bru run 10-card-payment --env sandbox --reporter-html reports/card-payment.htmlFour requests, one command, fresh data every time, and a report you can attach to a ticket or show in a sprint review.
The same chain in Postman
The Postman version maps line for line. Capture in the post-response script of Create customer:
if (pm.response.code === 200) {
  pm.collectionVariables.set("customerId", pm.response.json().id);
}
pm.test("customer created", () => {
  pm.response.to.have.status(200);
  pm.expect(pm.response.json().id).to.match(/^cus_/);
});
Guard in the pre-request script of Partial refund:
if (!pm.collectionVariables.get("paymentIntentId")) {
  pm.execution.skipRequest();
}
Set bodies to x-www-form-urlencoded with the same keys, and run with the Collection Runner or newman run. Remember to clear the captured variables at the start of the run, the same reset habit as in Bruno.
How do you refresh an OAuth token automatically?
Put it in a collection-level pre-request script so every request gets a valid token without a separate “get token” step. This pattern suits APIs that use the OAuth 2.0 client credentials flow, which most bank and enterprise APIs do:
// Collection pre-request script (Bruno)
const expiresAt = bru.getVar("tokenExpiresAt") || 0;

if (Date.now() > expiresAt - 60000) {          // refresh 60s before expiry
  const response = await bru.sendRequest({
    method: "POST",
    url: bru.interpolate("{{authUrl}}/oauth/token"),
    headers: { "Content-Type": "application/x-www-form-urlencoded" },
    data: [
      "grant_type=client_credentials",
      `client_id=${encodeURIComponent(bru.getProcessEnv("CLIENT_ID"))}`,
      `client_secret=${encodeURIComponent(bru.getProcessEnv("CLIENT_SECRET"))}`,
      "scope=payments:write"
    ].join("&")
  });

  bru.setVar("accessToken", response.data.access_token);
  bru.setVar("tokenExpiresAt", Date.now() + response.data.expires_in * 1000);
}
Collection auth then uses {{accessToken}}. The client secret lives only in .env, the token lives only in a runtime variable, and nothing sensitive is ever written to a file. The credential side of this, and why short-lived tokens beat long-lived keys, is covered in API keys, PATs, and OAuth tokens.
How do you poll an asynchronous API until the status is final?
Many payment APIs accept a request immediately and settle it later, like the payments API from Part 4 whose 201 means ACCP, not settled. To prove the final outcome, loop on the status request until it reaches a final status or an attempt limit.
Bruno, in the post-response script of a request named Poll payment status:
const status = res.getBody().status;
const attempt = Number(bru.getVar("pollAttempt") || 0) + 1;
bru.setVar("pollAttempt", attempt);

const finalStatuses = ["ACSC", "RJCT"];

if (!finalStatuses.includes(status) && attempt < 15) {
  await bru.sleep(2000);
  bru.runner.setNextRequest("Poll payment status");
} else {
  bru.setVar("finalStatus", status);
  bru.setVar("pollAttempt", 0);
}
Postman, same request:
const status = pm.response.json().status;
const attempt = Number(pm.collectionVariables.get("pollAttempt") || 0) + 1;
pm.collectionVariables.set("pollAttempt", attempt);

if (!["ACSC", "RJCT"].includes(status) && attempt < 15) {
  pm.execution.setNextRequest(pm.info.requestName);
  setTimeout(() => {}, 2000);   // the runner waits for the timer before moving on
} else {
  pm.collectionVariables.set("finalStatus", status);
  pm.collectionVariables.set("pollAttempt", 0);
}
Then a separate test in the next request asserts finalStatus. Three rules make polling trustworthy:
- Always cap the attempts. An uncapped loop turns a stuck payment into a runner that never ends, and a stuck payment is precisely the defect you want reported.
- Treat hitting the cap as a failure, with the last observed status in the message. “Still ACSP after 30 seconds” is a useful defect; a timeout is not.
- Loops only work in a collection run. Sending the single request by hand ignores
setNextRequest, which confuses everyone exactly once.
What each status in that loop actually guarantees is in ISO 20022 payment status codes. When a provider offers webhooks, they replace polling with a push; specifying and testing them is covered in webhooks explained for analysts.
How do you debug a chain that breaks?
Work outward from the variable, because nearly every broken chain is a variable problem.
- Log the value at capture.
console.log("captured", bru.getVar("paymentIntentId")). Bruno shows logs in the Timeline; Postman in the Console. - Check the capture ran on the right branch. A capture inside
if (status === 200)does nothing when the call returned402. - Check the scope. A value set with
pm.variables.setis gone when the run ends; a stale environment value with the same name may be winning. The precedence ladder is in Part 2. - Check the request order. Numbered file names and
seqvalues control it. A renamed request can silently change the order. - Check you are in a runner.
setNextRequest,skipRequest, and iteration data only apply in collection runs. - Check the resolved request. Both tools show the final URL and body actually sent. Compare it with what you intended.
What rules keep scripts maintainable?
- Keep scripts under 20 lines. Longer means logic that belongs in a shared collection or folder script.
- Scripts prepare and capture; tests assert. Mixing them makes reports unreadable.
- Reset captured variables at the start of every chain. Stale IDs produce passing tests against the wrong data.
- Generate unique data per run. Hardcoded references collide on the second run.
- Guard dependent requests. Skip with a clear reason instead of cascading failures.
- Never write secrets with a persisting call. Runtime variables for tokens, always.
- Name requests as business steps, because
setNextRequestreferences names, and so do reports.
The APIs for Analysts series
- What is an API and how it works
- Your first API collection in Bruno and Postman: requests, environments, variables, and secrets
- How to analyze an API: capability, data, behavior, limits, and change
- How to document an API: the sections consumers need, OpenAPI, and the error catalogue
- How to write API test cases: deriving a complete suite from one endpoint
- Chaining API requests with JavaScript (you are here)
- API proof of concept and demos: POCs and demos that settle decisions
- The analyst who can send a request: why it is an edge, and a 30-day plan
Beyond the core series, the APIs for Analysts learning path organizes companion articles by level: the API glossary and troubleshooting failed requests for beginners, webhooks and GraphQL at intermediate level, and API design review, versioning and breaking changes, API security testing, and API tests in CI for advanced analysts.
The takeaway
Request chaining turns a collection into a replayable business flow: capture a value in one post-response script, reference it as a variable in the next request, and run the sequence. Pre-request scripts generate unique data, set idempotency keys, and refresh tokens; post-response scripts capture, branch, and poll; tests assert. Use runtime variables for anything captured, reset them at the start of each chain, guard dependent requests, and cap every polling loop. The Stripe sandbox flow above, customer to payment to refund with a data-driven decline branch, is a complete template you can adapt to any payment API.
For the event-driven half of payment flows, see Automate Kafka Validation with Postman, and for the assertion and automation strategy behind the scripts, API Testing and QA Mastery for BAs. If a chain against your own API is fighting you, a 1:1 Tech BA Coaching Call is the fastest way to get it running.
Ahmed is a Senior Technical Business Analyst with 10+ years in banking and payments. He builds practical guides and tools for analysts at The Tech BA Toolkit.
Tags: Postman, Bruno, JavaScript, API Testing, Automation
About the author
Analyst Engineering is written by Ahmed, a Senior Technical Business Analyst with 10+ years of banking and payments delivery experience: ISO 20022 and SWIFT messaging, payments API integration, Kafka event validation, and production support. Every article comes from real delivery work, and each one is reviewed and updated as tools and standards change.
Related articles
- Your First API Collection in Bruno and Postman: Requests, Environments, and Variables Build a first API collection in Bruno and Postman: environments, variable precedence, inherited auth, secrets in .env or a vault, and requests imported from cURL.
- How to Write API Test Cases: 40 Tests Derived From One Endpoint How to write API test cases from the contract: a six-source derivation method, 40 worked cases for one payment endpoint, and data-driven automation in Bruno.
- API Proof of Concept: How Analysts Build POCs and Demos That Settle Decisions How an analyst builds an API proof of concept: the decision it must settle, a two-day spike, mocks from OpenAPI, webhook proof, a scripted demo, and evidence.
- API Testing: How to Test an API End to End A practitioner guide to API testing: status codes, response schemas, request chaining, authentication, error contracts, and the checks that actually catch defects.
Free account
Practice on the Labs, keep your progress
A free account, no password: an email link signs you in. It saves your steps and self-assessments on the Labs, shows your missions on a dashboard, unlocks the solutions, and, if you tick the box, sends you new missions and articles when they ship.
Your email is used to sign you in. Nothing else, unless you ask. Privacy.